QuickBooks can print required federal and state payroll forms or E-File them for you; it couldn’t be easier to complete your payroll reporting tasks.
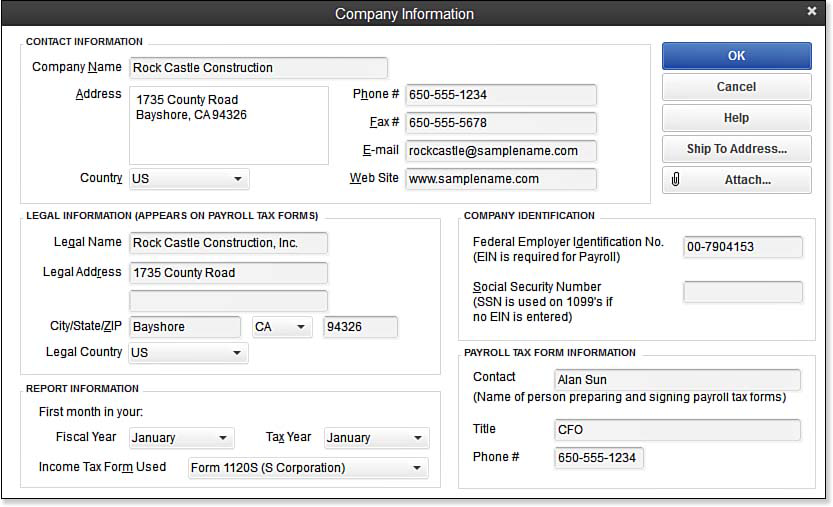
Before preparing your first payroll tax form, complete the Payroll Tax Information box on the Company Information dialog box. To do so, from the menu bar, select Company, Company Information. In the lower-right corner confirm the Contact Name, Title, and Phone # that will be included on the prepared payroll tax forms, as displayed in the lower right corner:
To prepare your federal or state forms, follow these steps:
1. On the Home page, click the Process Payroll Forms icon.
2. Select Federal Form or State Form. Click OK. If a Payroll Subscription Alert message displays, informing you to update your tax tables, go to step 3; otherwise, go to step 5.
3. Click Get Updates or Skip. I recommend that you select the Get Updates to ensure you have the latest tax tables and forms.
4. Click OK to close the Payroll Update message.
5. On the Home page, click the Process Payroll Forms icon.
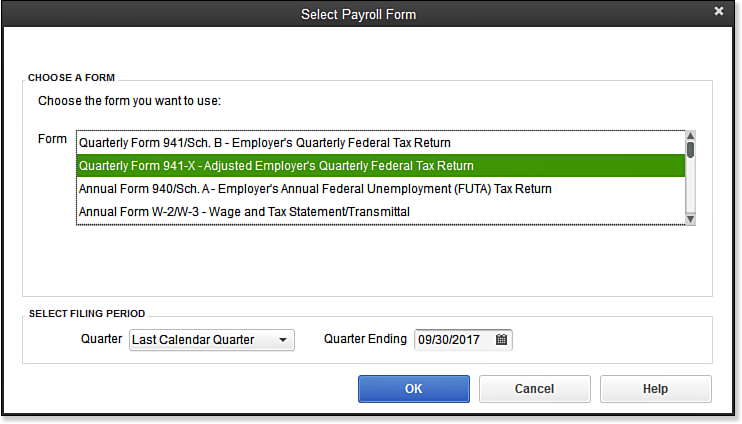
6. Select a Federal Form or State Form. Click OK. See below:

With the Enhanced Payroll Subscription, QuickBooks can prepare all your federal forms and many state forms.
7. Choose a form to prepare. Accounting professionals should choose the report forms labeled For Reporting Agents.
8. Select Filing Period, Quarter, and Quarter Ending date. Click OK.
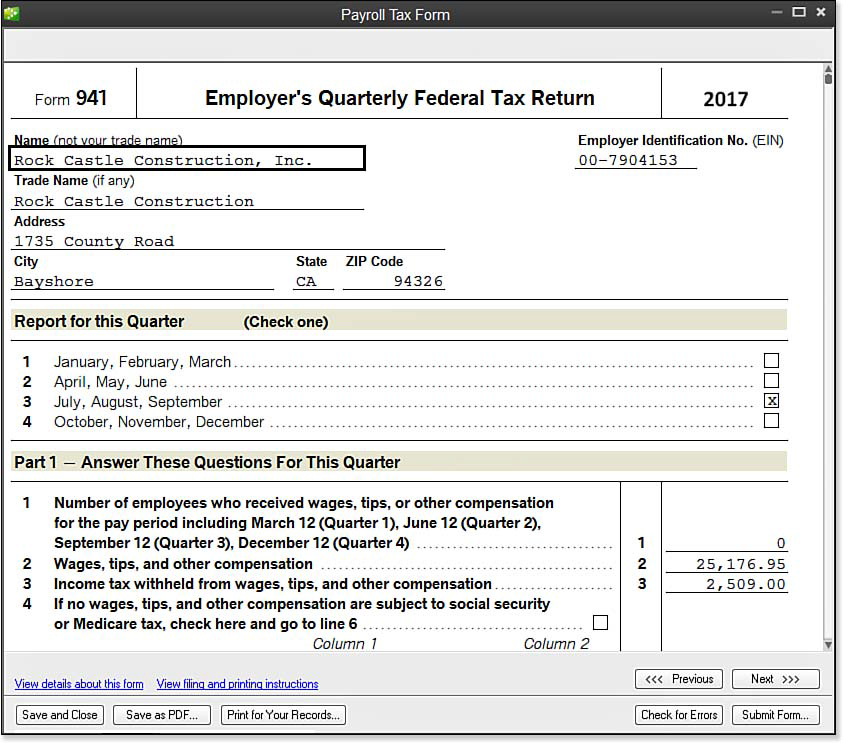
9. Complete any required fields on the displayed form. If you have questions about the form details, click the provided links. When you have completed the form, click the Check for Errors button, pictured here, in the lower right:
If any errors display, click the error, and QuickBooks will advance to that section of the form for you to complete or correct.
10. Click Next to advance to the next form page.
11. Click Save & Close if you need to return later to your saved work.
12. Click Save as PDF to save a PDF for your records; click Print for Your Records to prepare a paper copy; or click Submit Form if you have signed up for E-Filing.
From Laura Madeira’s QuickBooks 2013 In Depth


