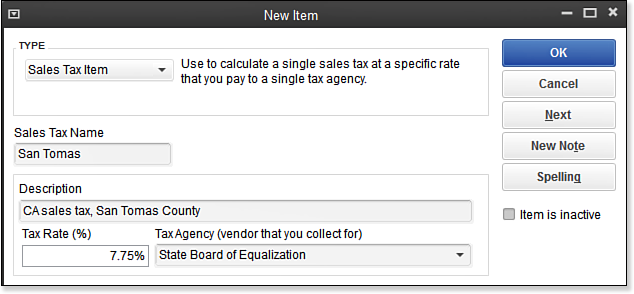
Sales tax groups are optional in QuickBooks. In many states, you are required to report the collection of sales tax for a combination of city, county, and state, but you want to show the customer a single tax rate. In QuickBooks, you can accomplish this by first creating your individual city, county, and state sales tax items, and then assigning them to a Sales Tax Group item type. The Sales Tax Group item is then assigned to the customer.
To create a Sales Tax Group item in your data file, follow these steps:
- From the menu bar, select Lists, Item List.
- From the Item drop-down list, select New to open the New Item dialog box. If necessary, click OK to close the New Feature message.
- In the Type drop-down list, select the Sales Tax Group item.
- Enter a Group Name or Number that identifies the group.
- In the Description box, enter the description you want printed on the customer’s invoice.
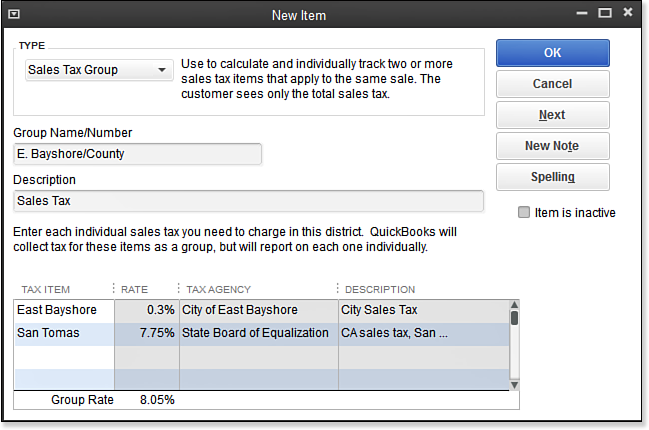
- In the Tax Item column, from the drop-down list, select the appropriate city, county, or state sales tax items previously created. See image here:
- Click OK to save the new Sales Tax Group item.
In the example shown here:
You are going to collect and remit the sales tax at a rate of 8.05%. In this example, part of the payment will be made to the State Board of Equalization and the other portion will be paid to the City of East Bayshore. However, when this tax group is assigned to a customer, the invoice will show a single rate of 8.05%.
From Laura Madeira’s QuickBooks 2013 In Depth


