Recording a Sales Receipt in QuickBooks
by Laura Madeira | April 24, 2013 9:00 am
Use a QuickBooks Sales Receipt when you are recording a sale and taking payment at the time of sale, commonly referred to as Cash on Delivery, or COD. Recording a sales receipt does not increase Accounts Receivable because you are receiving payment at the time of sale.
QuickBooks Sales Receipts can be added or removed from the Home page on the Desktop view—Company Preferences tab of the Preferences dialog box. To change this preference, you need to log in to the file as the Admin or External Accountant User.
Sales receipts are a perfect choice for a company that does not offer terms to its customers. Some retail establishments might summarize the day’s cash register tally into a Sales Receipt for a generic customer named “Daily Sales.”
Creating a Sales Receipt
To practice creating a sales receipt, open the sample data file as instructed in Chapter 1 of Laura Madeira’s QuickBooks 2013 In Depth[1]. You might also use these instructions if you are creating a sales receipt in your own data:
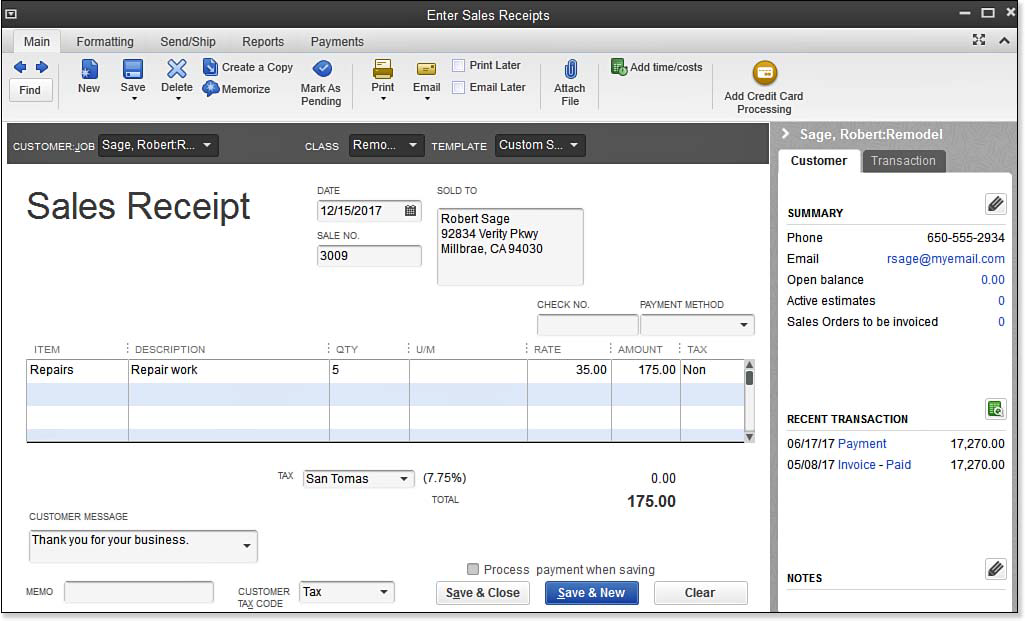
- On the Home page, click the Create Sales Receipts icon. The Enter Sales Receipts dialog displays, as shown here:
 [2]
[2]Enter sales receipts when payment is collected at the time of sale.
- In the Customer:Job drop-down list, select Sage, Robert:Remodel job.
- In the Class field, select Remodel.
- For this exercise, leave the Template, Date, and Sale No. as prefilled by QuickBooks.
- In the Check No. field, type 1234. In the Payment Method drop-down list, select Check.
- In the Item column, select Repairs.
- Using the Tab key on your keyboard, advance to the Qty field and type 5. QuickBooks prefills the Amount column. Accept the defaulted Tax column data. This tax assignment is assigned to the Repairs item setup.
- (Optional) Select a Customer Message.
- For this exercise, click Save. In the Print drop-down list on the Main tab of the ribbon, you can preview, print, or choose from other useful commands.
- Click Save & Close to complete the Sales Receipt, or click Save & New to practice creating another sales receipt transaction.
You might be asking, where did the money go that I just recorded in my accounting records? First, you will want to review your Payments preference as discussed in Chapter 9 of Laura Madeira’s QuickBooks 2013 In Depth[1], then learn how to add these payments to a bank deposit in the section titled “Making the Bank Deposit.”
From Laura Madeira’s QuickBooks 2013 In Depth[1]
- QuickBooks 2013 In Depth: http://www.quick-training.com/quickbooks-2013-in-depth/
- [Image]: http://www.quick-training.com/wp-content/uploads/2013/04/9.51.bmp
Source URL: http://www.quick-training.info/2013/04/24/recording-a-sales-receipt-in-quickbooks/