Reviewing Aged Item Receipts in QuickBooks
by Laura Madeira | August 5, 2013 9:00 am
One of the methods of receiving inventory is without the vendor’s bill. The effect of receiving inventory without a bill is to increase your inventory asset (debit) and increase your accounts payable (credit). The unique feature of this method is that QuickBooks creates an item receipt transaction that will not show in the Pay Bills window. QuickBooks recognizes that, because you did not receive the bill, it is not likely you should be paying it without the final bill details.
Often, goods will arrive at your business without a bill. A couple of reasons exist for a vendor to ship the goods to your place of business without a final bill:
- Shipping charges need to be added to the bill. Often, the vendor will not know the shipping charges when the goods are initially shipped.
- Vendors do not want to disclose the value of the inventory so that those who handle the inventory during shipping will not know the value of the goods being shipped.
What you might not know is that item receipts age, just like an outstanding accounts payable bill. To see whether you have open, outdated item receipts, go to the Vendor Center and click the Transactions tab, as shown below. Select the Item Receipts transaction type. Filter by All Dates and click the Date column to sort the transactions by date.
 [1]
[1]Use the Transactions tab of the Vendor Center to see all open item receipts.
If you find you have aged item receipts and you know you have paid the vendor, use the following steps to assign the check to the open item receipt. If you have paid your vendors with a credit card, you might also want to use these same instructions, substituting the credit card transaction for the check transaction:
- From the Vendor Center, select the Item Receipts transaction type on the Transactions tab.
- Unapplied item receipts display on the right. Click the header for the Date column to sort by date. You are looking for any old, outdated item receipts.
- If you find an aged item receipt that you know was paid to the vendor, double-click the item receipt to open the Create Item Receipts transaction.
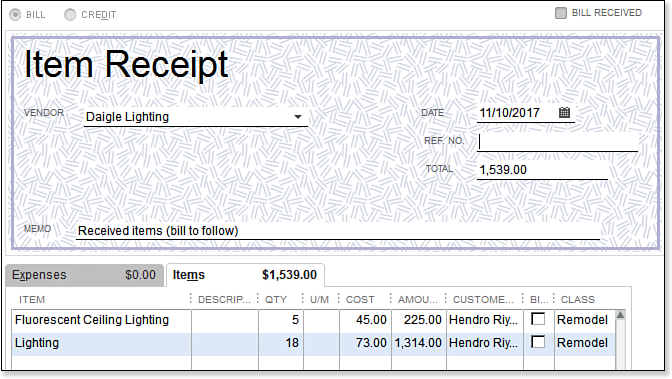
- Select the Bill Received checkbox (top right) as shown in the imagine below. The Item Receipt now becomes a vendor bill transaction type.
 [2]
[2]Item receipts do not show up in bills to be paid.
- Click Save & Close.
- Locate the check that was written to the vendor. From the Vendors tab on the Vendor Center, select the same vendor the item receipt was created for.
- On the right, in the Show drop-down list, select Checks. (Optional) Select a Filter By and Date range.
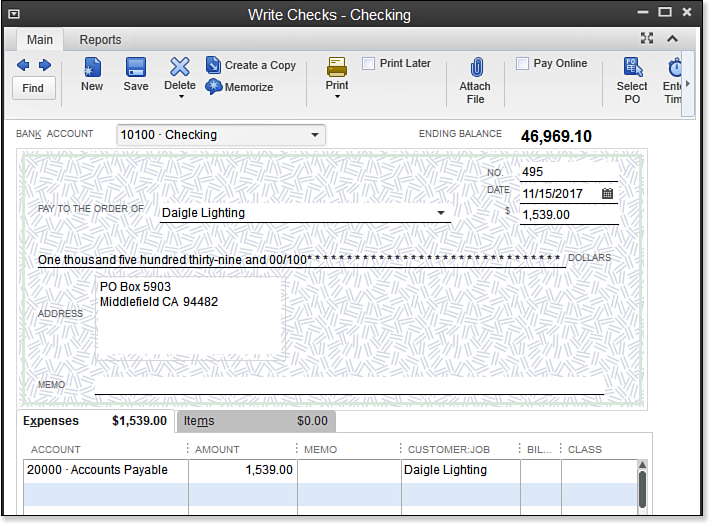
- After locating the check in the Vendor Center, double-click the check to open the Write Checks transaction. Modify the Account on the Expenses tab to be Accounts Payable, as shown here:
 [3]
[3]Changing the Expenses account to Accounts Payable and adding the vendor name on the same line creates a vendor credit from the check.
- Assign the Vendor name in the Customer:Job column. The effect of this updated transaction is to decrease (debit) Accounts Payable and decrease (credit) Cash.
- Click Save & Close.
- From the Home page, click the Pay Bills icon. The Pay Bills dialog box opens.
- In the Filter By drop-down list, select the vendor you are correcting the records for.
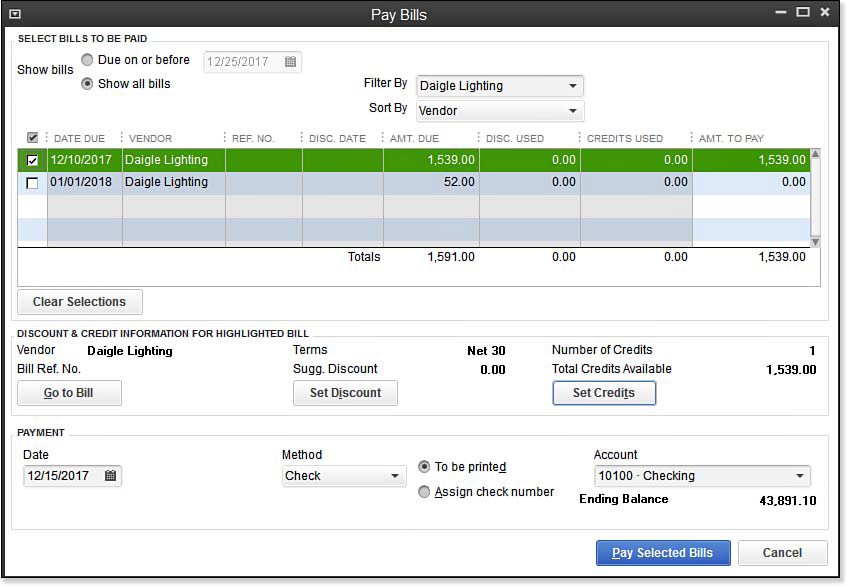
- Place a checkmark next to the bill, as shown here:
 [4]
[4]After the bill is selected, the Set Credits option is available.
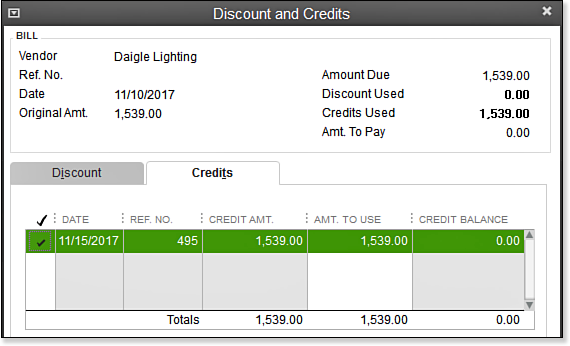
- As shown in the image below, click the Set Credits button to assign the modified check transaction from step 7 to the open vendor bill:
 [5]
[5]QuickBooks automatically matches a credit with a bill of the same amount, or you can select the credit and modify the amount assigned.
- Click Done to return to the Pay Bills dialog box. If your credit is the same amount as the open vendor bill, the Amt. To Pay column will be zero.
- Click Pay Selected Bills. Click Done to close the Payment Summary dialog box.
- [Image]: http://www.quick-training.com/wp-content/uploads/2013/08/6.12.bmp
- [Image]: http://www.quick-training.com/wp-content/uploads/2013/08/6.13.bmp
- [Image]: http://www.quick-training.com/wp-content/uploads/2013/08/6.14.bmp
- [Image]: http://www.quick-training.com/wp-content/uploads/2013/08/6-15.bmp
- [Image]: http://www.quick-training.com/wp-content/uploads/2013/08/6-16.bmp
- QuickBooks 2013 In Depth: http://www.quick-training.com/quickbooks-2013-in-depth/
Source URL: http://www.quick-training.info/2013/08/05/reviewing-aged-item-receipts-in-quickbooks/