How to Use the Customize My Forms Wizard in QuickBooks
by Laura Madeira | August 28, 2013 9:00 am
To create a consistent look and feel for your printed forms, consider using the Intuit—Customize My Forms Wizard. This feature is free for the first 30 days for each QuickBooks data file. After 30 days, if
you need to make changes to a design, the fee is $4.99 per design. Any changes you pay for come with a 60-day satisfaction guarantee. In just a few simple steps, you can add a professional look to all the
QuickBooks forms.
–> Note: If you would like to “practice” using this tool before committing the changes to your own forms, use the Rock Castle Construction file. When using the sample data for this exercise, you will not be able to save the design or apply it to your own Company’s QuickBooks forms.
To customize QuickBooks forms, follow these steps:
- From the menu bar select, Customers, Create Invoices.
- New for QuickBooks 2013 is the Ribbon Toolbar at the top of a displayed transaction. To continue with customizing your forms, select the Customize Design icon on the Formatting tab.
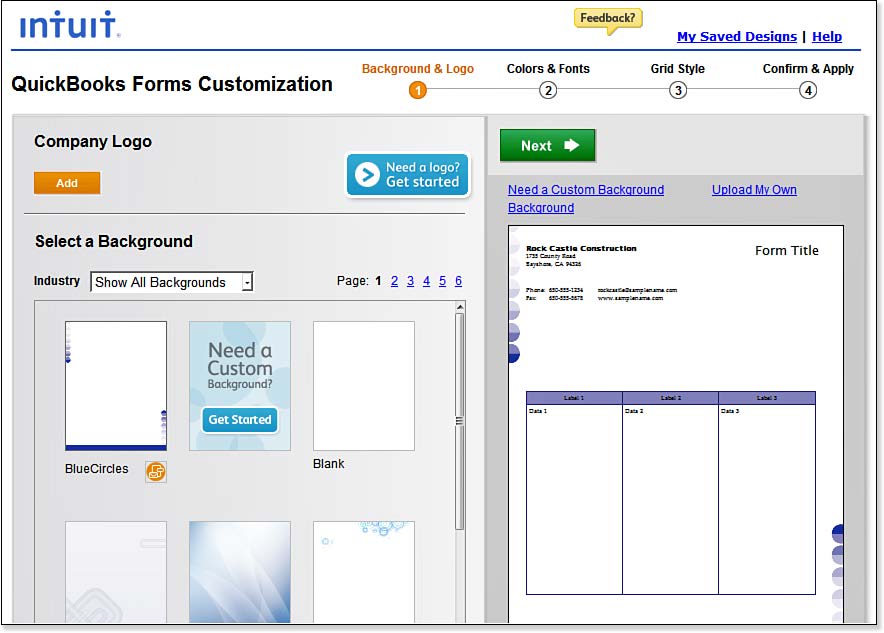
- The QuickBooks Forms Customization dialog box opens (as shown below). An Internet connection required. Choose a background that is specific to your business from the Industry drop-down list. As you select a background, the resulting design is displayed on the right.
 [1]
[1]Add a professional look to your business forms.
- Click the Add button under Company Logo to browse for your logo file. If you do not have a company logo, click the Need a Logo? Get Started button. Intuit has partnered with 99designs to offer very affordable custom design services.
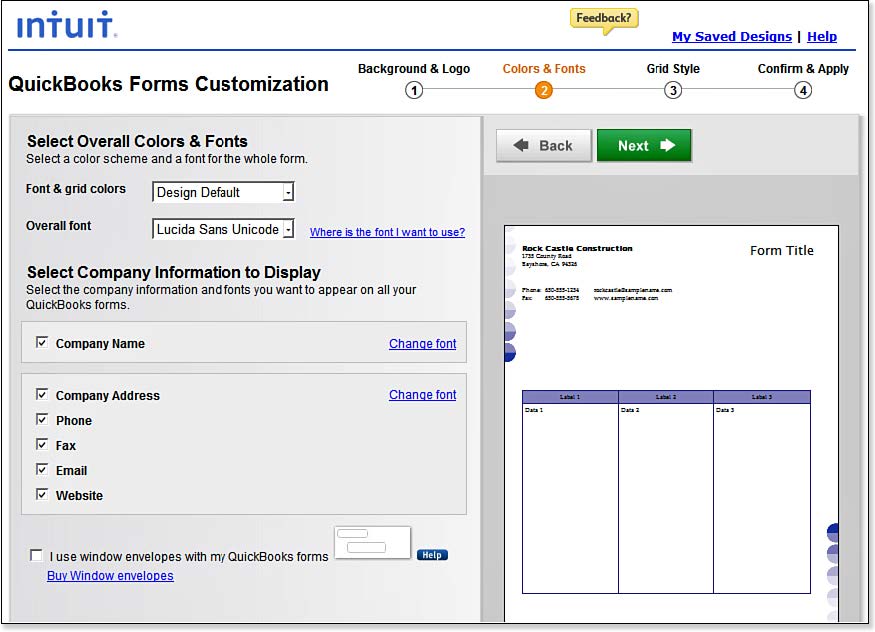
- Click Next to display Step 2—Colors and Fonts, as shown in the image below. Select your font and grid colors overall or for specific fields by clicking the appropriate drop-down list. A grayed-out field indicates the data for that field does not exist in your QuickBooks data file. (Optional) Place a checkmark in the box to indicate that you mail your invoices in window envelopes. Click Next.
 [2]
[2]Select font and grid colors and other design options for your customized forms.
- Step 3—Select a Grid Style displays. Click to select a shaded style grid of your choice. Click Next on the top of the dialog box.
- Step 4—Review Design displays. Click the Back button to make changes. Click Continue to select the forms to assign the design to. Click No Thanks to cancel your changes. You are redirected to a website that displays matching business forms.
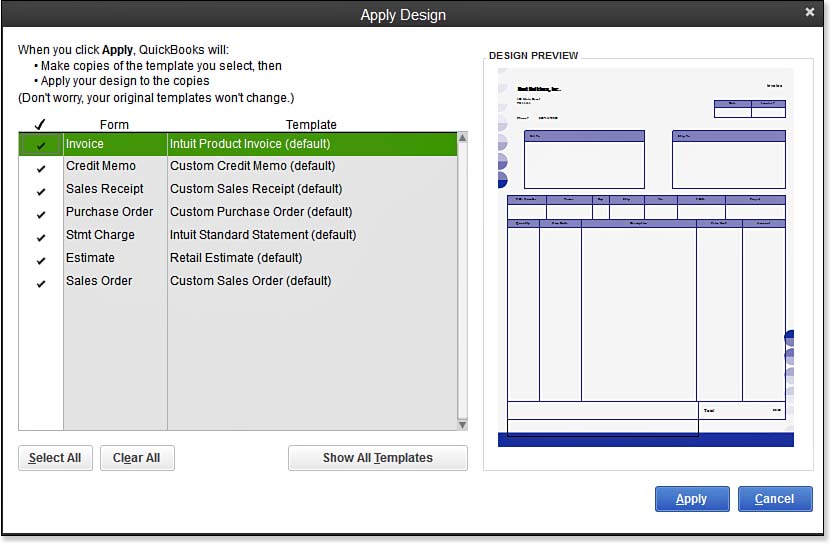
- The Apply Design dialog box displays (as shown below). Place a checkmark next to each of the forms to which you want to apply the customized design. You can select from the many QuickBooks forms (Invoice, Sales Receipt, Purchase Order, and so on) making it easy to customize several forms all at once!
 [3]
[3]Apply the design customization to multiple forms all at once.
- Click Apply, and the Design Applied dialog box displays with instructions for identifying your customized templates on the Templates list. After reading the details, click OK to close the message.
- The Save Design Online (Recommended) dialog box displays with these options:
- Save—The design is available for future editing; you will be prompted to define a name for the design and to create a secure login for future editing. A message displays showing the date the form was customized and the last day to make changes without an additional fee. Click OK to close.
- No Thanks—Select this if you do not want to save the design. A warning message displays; click OK to close, and you are redirected to a website showing other business items that match your customized style. Close the open web pages when completed reviewing the information.
- The Intuit Business Forms web page displays. Click the X in the top-right corner to close the web page when you’re finished with your review of the information.
–> Note: If you are prompted for payment to apply the designs to your forms, this indicates that you have previously used the initial free service. After a period of time, the service is available, but requires a minimal fee.
- [Image]: http://www.quick-training.com/wp-content/uploads/2013/08/9.28.jpg
- [Image]: http://www.quick-training.com/wp-content/uploads/2013/08/9.29.jpg
- [Image]: http://www.quick-training.com/wp-content/uploads/2013/08/9.30.jpg
- QuickBooks 2013 In Depth: http://www.quick-training.com/quickbooks-2013-in-depth/
Source URL: http://www.quick-training.info/2013/08/28/how-to-use-the-customize-my-forms-wizard-in-quickbooks/